CUSTOMIZATION +
CATALOG+
PURCHASES+
CONTENT+
CUSTOMER SERVICE+
PROMOTIONS+
CONFIGURATION+
ACCOUNTS+
FULFILL SHIPMENTS
Once a customer places order for products on your web store, the responsibility of fraud approval and payment settlement lies with Buildabazaar. After the payment settlement for the order is completed by Buildabazaar, the order is ready to be shipped to the customer. The order is thus present in the list of shipments that need to be fulfilled.
To view the list of shipments:
- In the Admin Panel page, on the Purchases drop down menu, click Fulfill Shipments. The Fulfillment Panel opens, which has a list of shipments that are to be shipped.
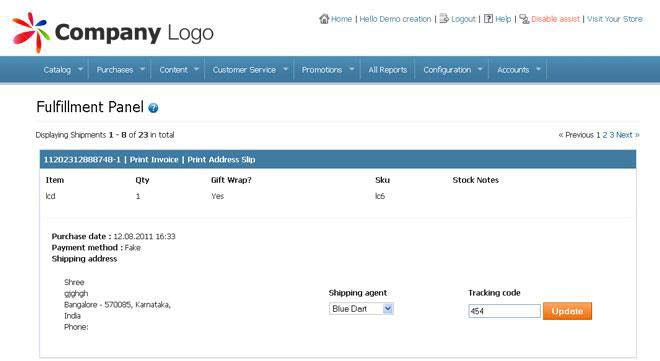
This Fulfillment Panel page displays the order id and the purchase date and time (the date and time at which the customer placed the order).
An Invoice is required to ship the product to the customer’s site and capture all details of order, payment, shipping and tax. Platform offers you an option to print the invoice.
To Invoice the Shipment:
In the Fulfillment Panel page, click Invoiced for the relevant purchase order.
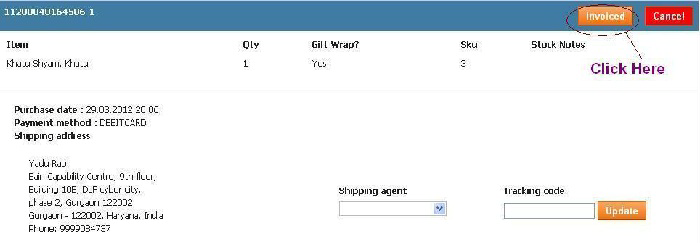
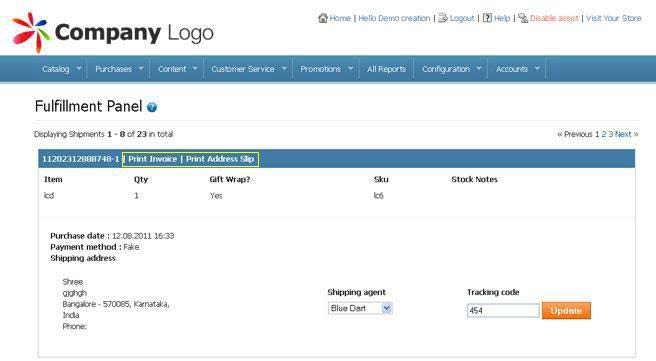
The web page reloads with two options present next to the purchase order number:
- Print Invoice: Used to print the invoice generated.
- Print Address Slip: Used to print the address slip. The address slip is printed so as to help the shipping agent to know the delivery address.
To view the list of shipments:
- In the Admin Panel page, on the Purchases drop down menu, click Fulfil Shipments. The Fulfillment Panel opens, which has a list of shipments that are to be shipped.
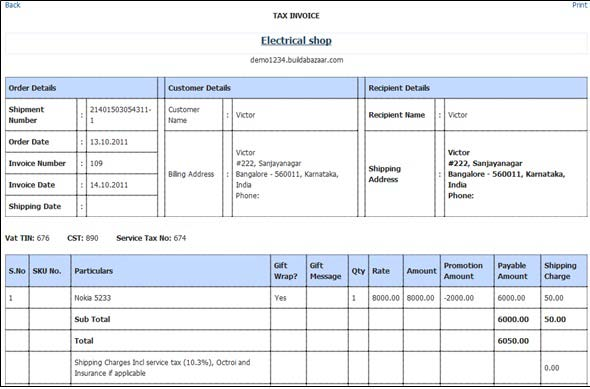
- Click Back to go back to the Fulfillment Panel page.
To Print an Address Slip:
- In the “Fulfillment Panel” page, go to “Print Invoice and Address Slip” tab and click “Print Address Slip”.
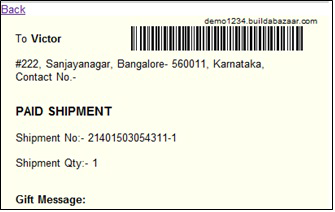
- Click “Back” to go back to the fulfillment panel page.
Once the invoice and address slip are printed, you need to assign a shipping agent who is going to deliver the product to the customer.
To Assign a Shipping Agent:
- In the “Fulfillment Panel Page”– Print Invoice and Address Slip page, click the “Shipping Agent” drop-down menu and then click on the required shipping agent.
- Enter the tracking code provided by the shipping agent in the “Tracking Code” box and click “Update”. This tracking code can be used by your store’s customer to track the progress of delivery.
Once you have handed over the product to shipping agent mark the order as Complete.
Click “Complete” to make this state transition.

To View the Order in Complete State Transition:
- In the Admin Panel page, place the cursor on “Purchases” drop down menu and click “Manage Purchases”.
- Click “Complete”. The Purchases webpage showing all the orders that are in complete state opens.
A sample purchase number which has moved to complete state is highlighted in the following screenshot.

To View the Details of a Purchase Number:
In the Fulfillment Panel page click on the “Purchase Number” link. A webpage showing all the details of the order number opens.
You can also view the history of state transitions for the order at the bottom of the page. At various state transitions, the customer is notified of the state change through SMS and email.


